Retrofitting Recessed Can Lighting to LED
There are many inefficient and costly-to-maintain compact fluorescent and HID recessed can lights that should be converted to LED. Because of the variety of options in the marketplace, the trick is how to retrofit the recessed can to LED. Here are the steps to take prior to deciding your best option:
1. Where is the recessed can being used?
2. What is the size of the opening in the recessed can (most common 4, 6, or 8 inch)? Measure the inside diameter of the can.
3. What is the voltage of the recessed can (120 volt or 277 volt)?
4. What are the current light bulbs in the fixture?
5. How many light bulbs are in the fixture?
6. How are the light bulbs mounted in the fixture – base horizontal or base vertical?
7. What is the current ballast in the fixture?
8. How long has the ballast been in operation?
9. What type of light socket is in place currently (plug-in or screw-in)?
10. Are the light bulb sockets in good condition?
11. Is there a trim ring or lens in the current fixture (take a picture inside the can)?
12. Do you need more light, less light, or about the same amount?
13. Does it need to be dimmable?
Once these questions are answered, you will be able to narrow down your choices out of the following options:
A. Replace your existing light bulb with an LED bulb.
B. Gut the existing fixture and install an LED insert.
C. Replace the entire fixture with a new LED can.
Option A – Replace Your Existing Light Bulb with an LED Bulb
The major benefit of doing this is that you know there will be a solution that will fit. Depending on the current lamp you have, there are several options to choose from within this category:
HID Lamp
If you have an HID lamp (metal halide or high pressure sodium), the easiest solution is to go with a screw-in LED lamp that will fit the fixture and provide similar/better light output. You will need to confirm voltage before deciding your option, and the only way to make an LED screw-in work is by disconnecting the existing ballast. 120 volt is not an issue at all, but if the can is 277 volt your screw-in options are limited and you run the risk of someone down the line assuming the can is 120 volt and screwing in a product only rated at 120 volts.
Incandescent, Halogen, or Screw-in Compact Fluorescent Lamp
If you have any of these medium base screw-in bulbs currently, the fixture is most likely 120 volt and your best bet is to replace it with a similar-shaped LED bulb unless you want a new look. The LED will provide the same or better light at a fraction of the energy use and it will last a lot longer.
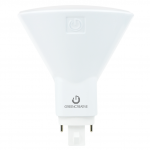
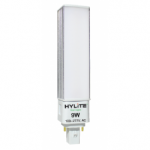
Plug-in Compact Fluorescent Lamp
Plug-in CFL lamps are 120-277 volt rated, so all LED plug-in CFL replacements are 120-277 volt rated. That makes it easy from that standpoint, but there are often issues with these type of light fixtures. Specifically, over time the sockets get brittle and the ballast is difficult to maintain. If you decide the sockets are in good shape, then you have a decision to make between two types of LED plug-in CFL replacements:
1. LED plug-in that uses existing fluorescent ballast. This option is the easiest of the two from an install standpoint because all you have to do is plug in the lamp and it should work. The issue with this is that the LED plug-in lamp will always rely on the fluorescent ballast for it to work.
2. LED plug-in that works directly off line voltage. This option costs more upfront from an install standpoint, but long term it means you will only have one failure point – the lamp itself. This option is often preferred because CFL ballasts are expensive and often hard to maintain.
There is a 3rd type that is being introduced in the marketplace that claims to work off the existing fluorescent ballast and then when the ballast fails will work off line voltage (after disconnecting the ballast). That sounds great, but most of these products are offered by unproven and inexperienced lighting manufacturers who haven’t been in business as long as they claim their warranty to be. So while this technology might get to a point of making sense, until it’s proven we recommend staying away from it and making a choice between using the ballast or not.
Shop Premier LED PL Lamps below:
Option B – Gut the Existing Fixture and Install an LED Insert
With this option, it is critical to know the size of the fixture and what the inside of the can contains before you go any further. There are many variables associated with the parts inside the recessed cans (reflectors, trim rings, lenses, etc) and some fixtures cannot take an LED insert. So if that is the case, you need to go with Option A – new bulb, or Option C – new fixture. If you have a fixture that can take an LED insert, you then need to determine the features you are looking for. This option gives the recessed can a new look, improved light levels and better aesthetics without the cost of paying for a new fixture.
Shop Premier LED Inserts below:
Option C – Replace the Entire Fixture with a New LED Recessed Can
If you are not able to retrofit the existing recessed can with an LED insert and don’t like the idea of an LED bulb, your best option is to go with a new LED fixture. Although it is the most expensive of the 3 options, it gives you piece of mind knowing that the fixture is built for the LED it contains and will give you the best overall lighting. Many times this is your longest life option as well, so in applications where access is an issue, a new LED recessed can fixture is the way to go.
Shop Premier LED Recessed Fixtures below:

I,m triying to find large commeriical 277volt halogen resessed light fixtures for our church celiling worship center. The bulb is about 3in. Long and it has a small base. The top is around 12 in in diameter. Can you help me find some pictures of some?